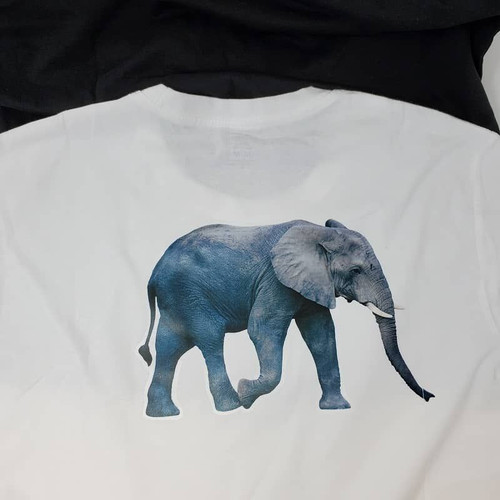
Craft Jet Heat Transfer Paper is sometimes called printable heat transfer vinyl. Technically it is not HTV - it's made from synthetic paper, not vinyl. But there are similarities. Craft Jet Heat transfer paper is designed for clothing graphics and it applies with a heat press or iron.
The Light paper is for white or light coloured fabrics. It can be identified by the red grid on its backing. The Light paper retains its colours better during washing. The Dark paper is for coloured and dark fabrics. It has blue lines on its backing. Please be aware, the different papers have different printing and application instructions.
Craft Jet Heat Transfer Paper is compatible with desktop inkjet printers (aqueous ink). Additionally, the Dark option is compatible with crayons or markers. Create one-of-a-kind hand-drawn images. Do not use with toner/laser printers.
Instructions for Dark (Blue Line):
Instructions
Compatible Ink Systems
• Desktop inkjet printers (aqueous ink)
• Markers
• Crayon
• NOT COMPATIBLE WITH TONER/LASER
PRINTERS
Prepare Image
1. Print REGULAR orientation (do not
reverse/flip/mirror)
2. Print/draw on non-glossy side (un-lined)
3. Cut around image if desired
Transfer Image – Heat Press
1. Preheat press to 375°F
2. Pre-press garment for 3-5 seconds to release
moisture and remove wrinkles
3. Peel liner from back of printed transfer
4. Place printed transfer onto the garment, print
side up
5. Cover transfer with parchment paper
6. Press for 25 seconds with medium to high
pressure
1. Peel parchment paper cold (wait 2 minutes) or
hot (wait 5 seconds). For best colour retention
during washing, peel hot.
Transfer Image – Iron
2. Preheat iron to the “cotton” setting (do not
use steam)
3. Make sure you have a hard, smooth pressing
surface covered with a layer of fabric (such as
a pillowcase. DO NOT USE AN IRONING
BOARD
4. Pre-iron garment to release moisture and
remove wrinkles
5. Peel liner from back of printed transfer
6. Place printed transfer onto the garment, print
side up
7. Cover transfer with parchment paper
8. Using FIRM, STEADY pressure, holding iron
with both hands, and applying your body
weight, iron on each area of the sheet for 20
seconds. Make sure to light the iron
completely when moving to a new position.
Continue this process until you have ironed
the entire sheet. Be sure to cover all corners
and edges.
9. If transferring several images on one sheet, it
works best to iron all and then peel all.
10. Peel parchment paper cold (wait 2 minutes) or
hot (wait 5 seconds). For best colour retention
during washing, peel hot.
Washing Instructions
1. Turn garment inside out
2. Wash in cold water
3. Do not use bleach or bleach alternative
detergents
4. Remove garment promptly from the washer
(the colour may bleed if left in the washer)
5. Dry on LOW temperature
Instructions for Light (Red Grid):
Instructions
Compatible Ink Systems
• Desktop inkjet printers (aqueous ink)
• NOT COMPATIBLE WITH TONER/LASER
PRINTERS
Prepare Image
1. Print MIRRORED image
2. Print on solid white side (non-grid)
3. Cut around image if desired
Transfer Image – Heat Press
1. Preheat press to 380°F
2. Pre-press garment for 3-5 seconds to release
moisture and remove wrinkles
3. Place printed transfer onto the garment, print
side DOWN
4. Press for 20-25 seconds with medium to high
pressure
5. Peel the liner
a. Peel cool (wait 2 minutes) for a glossy
finish
b. Peel hot (wait 5 seconds) for a matte
finish
Transfer Image – Iron
(Recommended for t-shirts and light-weight
fabrics only)
1. Preheat iron to the “cotton” setting (do not
use steam)
2. Make sure you have a hard, smooth pressing
surface covered with a layer of fabric (such as
a pillowcase. DO NOT USE AN IRONING
BOARD
3. Pre-iron garment to release moisture and
remove wrinkles
4. Place printed transfer onto the garment, print
side DOWN
5. Size: Full sheet transfer
a. Using 2 hands, push down and firmly
slide the iron up and down (as shown
in the diagram) for 90 seconds. Make
enough passes to completely iron the
transfer 2 times. The iron should be
halfway off the edges when the edges
are ironed.
b. Using 2 hands, push down and firmly
slide the iron side to side (as shown in
the diagram) for 90 seconds. Make
enough passes to completely iron the
transfer 2 times. The iron should be
halfway off the edges when the edges
are ironed.
6. Size: Half sheet transfer
a. Using 2 hands, push down and firmly
slide the iron over the transfer paper
for 90 seconds total.
7. Size: Smaller than iron
a. Using 2 hands, push down and hold
for 30 seconds. Move iron slightly to
ensure complete contact between
transfer and garment.
8. Peel the liner after garment has cooled for
approximately 60 seconds
Washing Instructions
1. Turn garment inside out
2. Wash in cold water
3. Do not use bleach or bleach alternative
detergents
4. Dry on LOW temperature
5. Do not iron directly on the transferred area


